So I picked up a new hobby! Or maybe rather, I decided to expand on something I just barley touched before. This will become a long blogpost about troubleshooting but also in part about my experice with this printer in particular. For some background I have 3D-printed before but almost always on printer someone else has broken in and fiddled with. Thus many of the issues below would probalby be solved faster or maybe even avoided by someone else. However, this is the Kingroon KPS3 Pro V2, it’s very much a printer oriented against the beginner. It’s also worth noting I bought this specific printer for two main reasons, firstly it runs Klipper, the somewhat new firmware of 3D printers. Old printers run Marlin, and often one uses Octoprint to get a web-interface to upload prints to, in Klipper the whole printer is controlled via a webinterface. Besides that it also has built in support for functions such as input shaping. Secondly the printers small footprint, I live an apartment with limited space so this is a bit of a compromise. If that wasn’t the case I would most likely buy a Core XY printer instead.
With that taken care of, here’s the TL;DR: This printer seems rushed, the support is mostly non-existing and you’re as of now pretty much on your own as the community is small, but if you want a small printer and like an engineering challenge this is a cheap option. Just make sure to buy extra hot ends.
After ordering the printer took about two weeks to arrive shipped from the EU-warehouse. Totally acceptable. I unpacked it but found uo physical instructions, I later found then on the included USB-drive, it would have been nice with something to tell me they existed, for the person who has built many printers this is maybe a given but again, this is geared towards the beginner. https://www.youtube.com/watch?v=2tjTUEnOoYk
I then installed one cable the wrong way, lead to loading screen that never ended. Got the interface to load via ethernet ‘ERROR mcu ‘mcu’: Unable to connect’ The klippy host software is attempting to connect. Please retry in a few moments. This was resolved by connecting the cable the right way.
I then used the built in bed probe feature. the bed seems to be unsquare, this is always the issue with printers, getting the axis square. A tactic I used later was to use a block under the x-axis and move it forwards and back to make sure the x-axis is parallel with the bed. Worth noting is the x-axis can be adjusted if a few screws are loosened. This will shift if you by accident fun the printing head down into the bed with the printing head too far out.
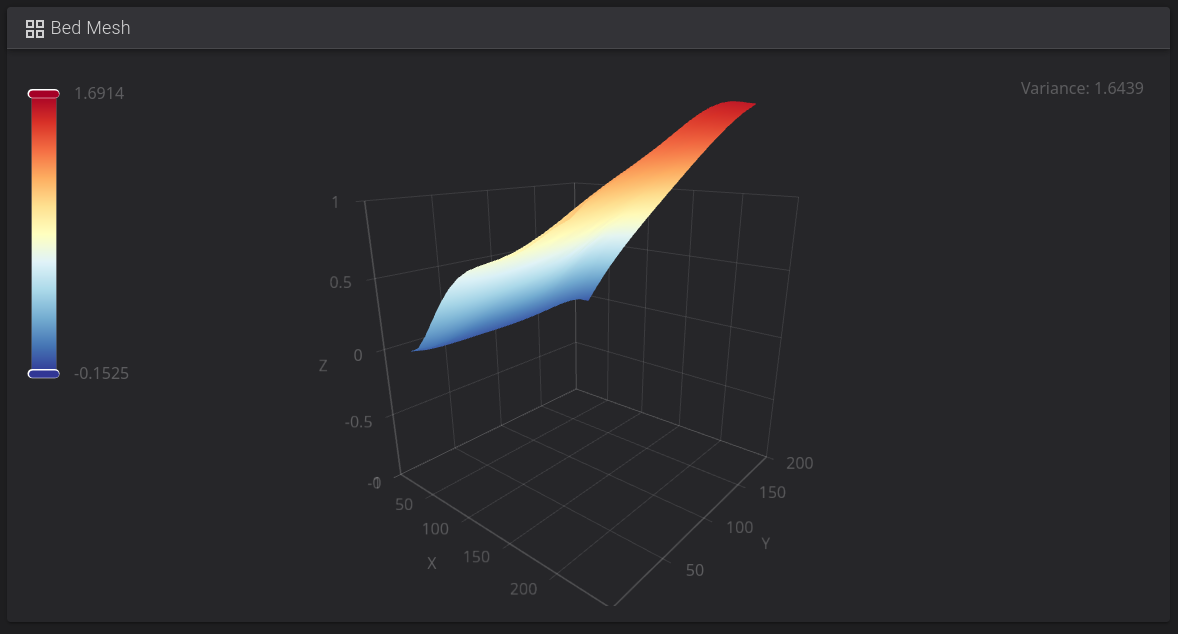
Klipper partly on Chineese, not really sure why one has chosen to name some macros in both Chineese and English. I will come back to this later.

Cura
The Cura settings and instructions are lacking. Given I run Linux on my computer I spent some time trying to understand what and where to place the files. No matter what I did I could not get it to work. After many hours I found a comment noting it specifically works for Cura 5.3 which isn’t obvious, also I think the README might be wrong, it asks the user to put the STL-file in a folder called mesh, but in reality it should be called meshes, this directory you will have to create. Another problem is that the infill setting can’t be changed from 15 procent, it’s hard locked in the config somewhere. In any case here’s where the files should be saved, this could also bee seen through the menu. Once the files are in the correct place and you restart Cura you should see the printer in the new printer menu.
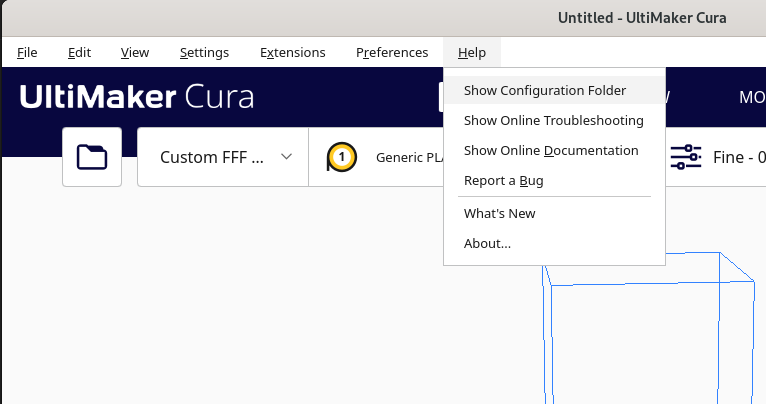
For anyone looking, this is what you need to do:
#cd into whereever you downloaded the files
sudo mkdir ~.local/share/cura/5.3/resources/meshes
sudo cp -r KINGROON_KP3S_PRO_V2 ~/.local/share/cura/5.3/resources/quality/
sudo cp KINGROON_KP3S_PRO_V2.def.json ~/.local/share/cura/5.3/resources/definitions/
sudo cp KINGROON_KP3S_PRO_V2_extruder_0.def.json /~/.local/share/cura/5.3/resources/extruders/
sudo cp KINGROON_KP3S_PRO_V2.STL ~.local/share/cura/5.3/resources/meshes/
First print
First print went mostly well. However, I did have some old filament showing up all of a sudden. I became suspicious. After having a look it seems it’s leaking plastic between the nozzle and heating block.
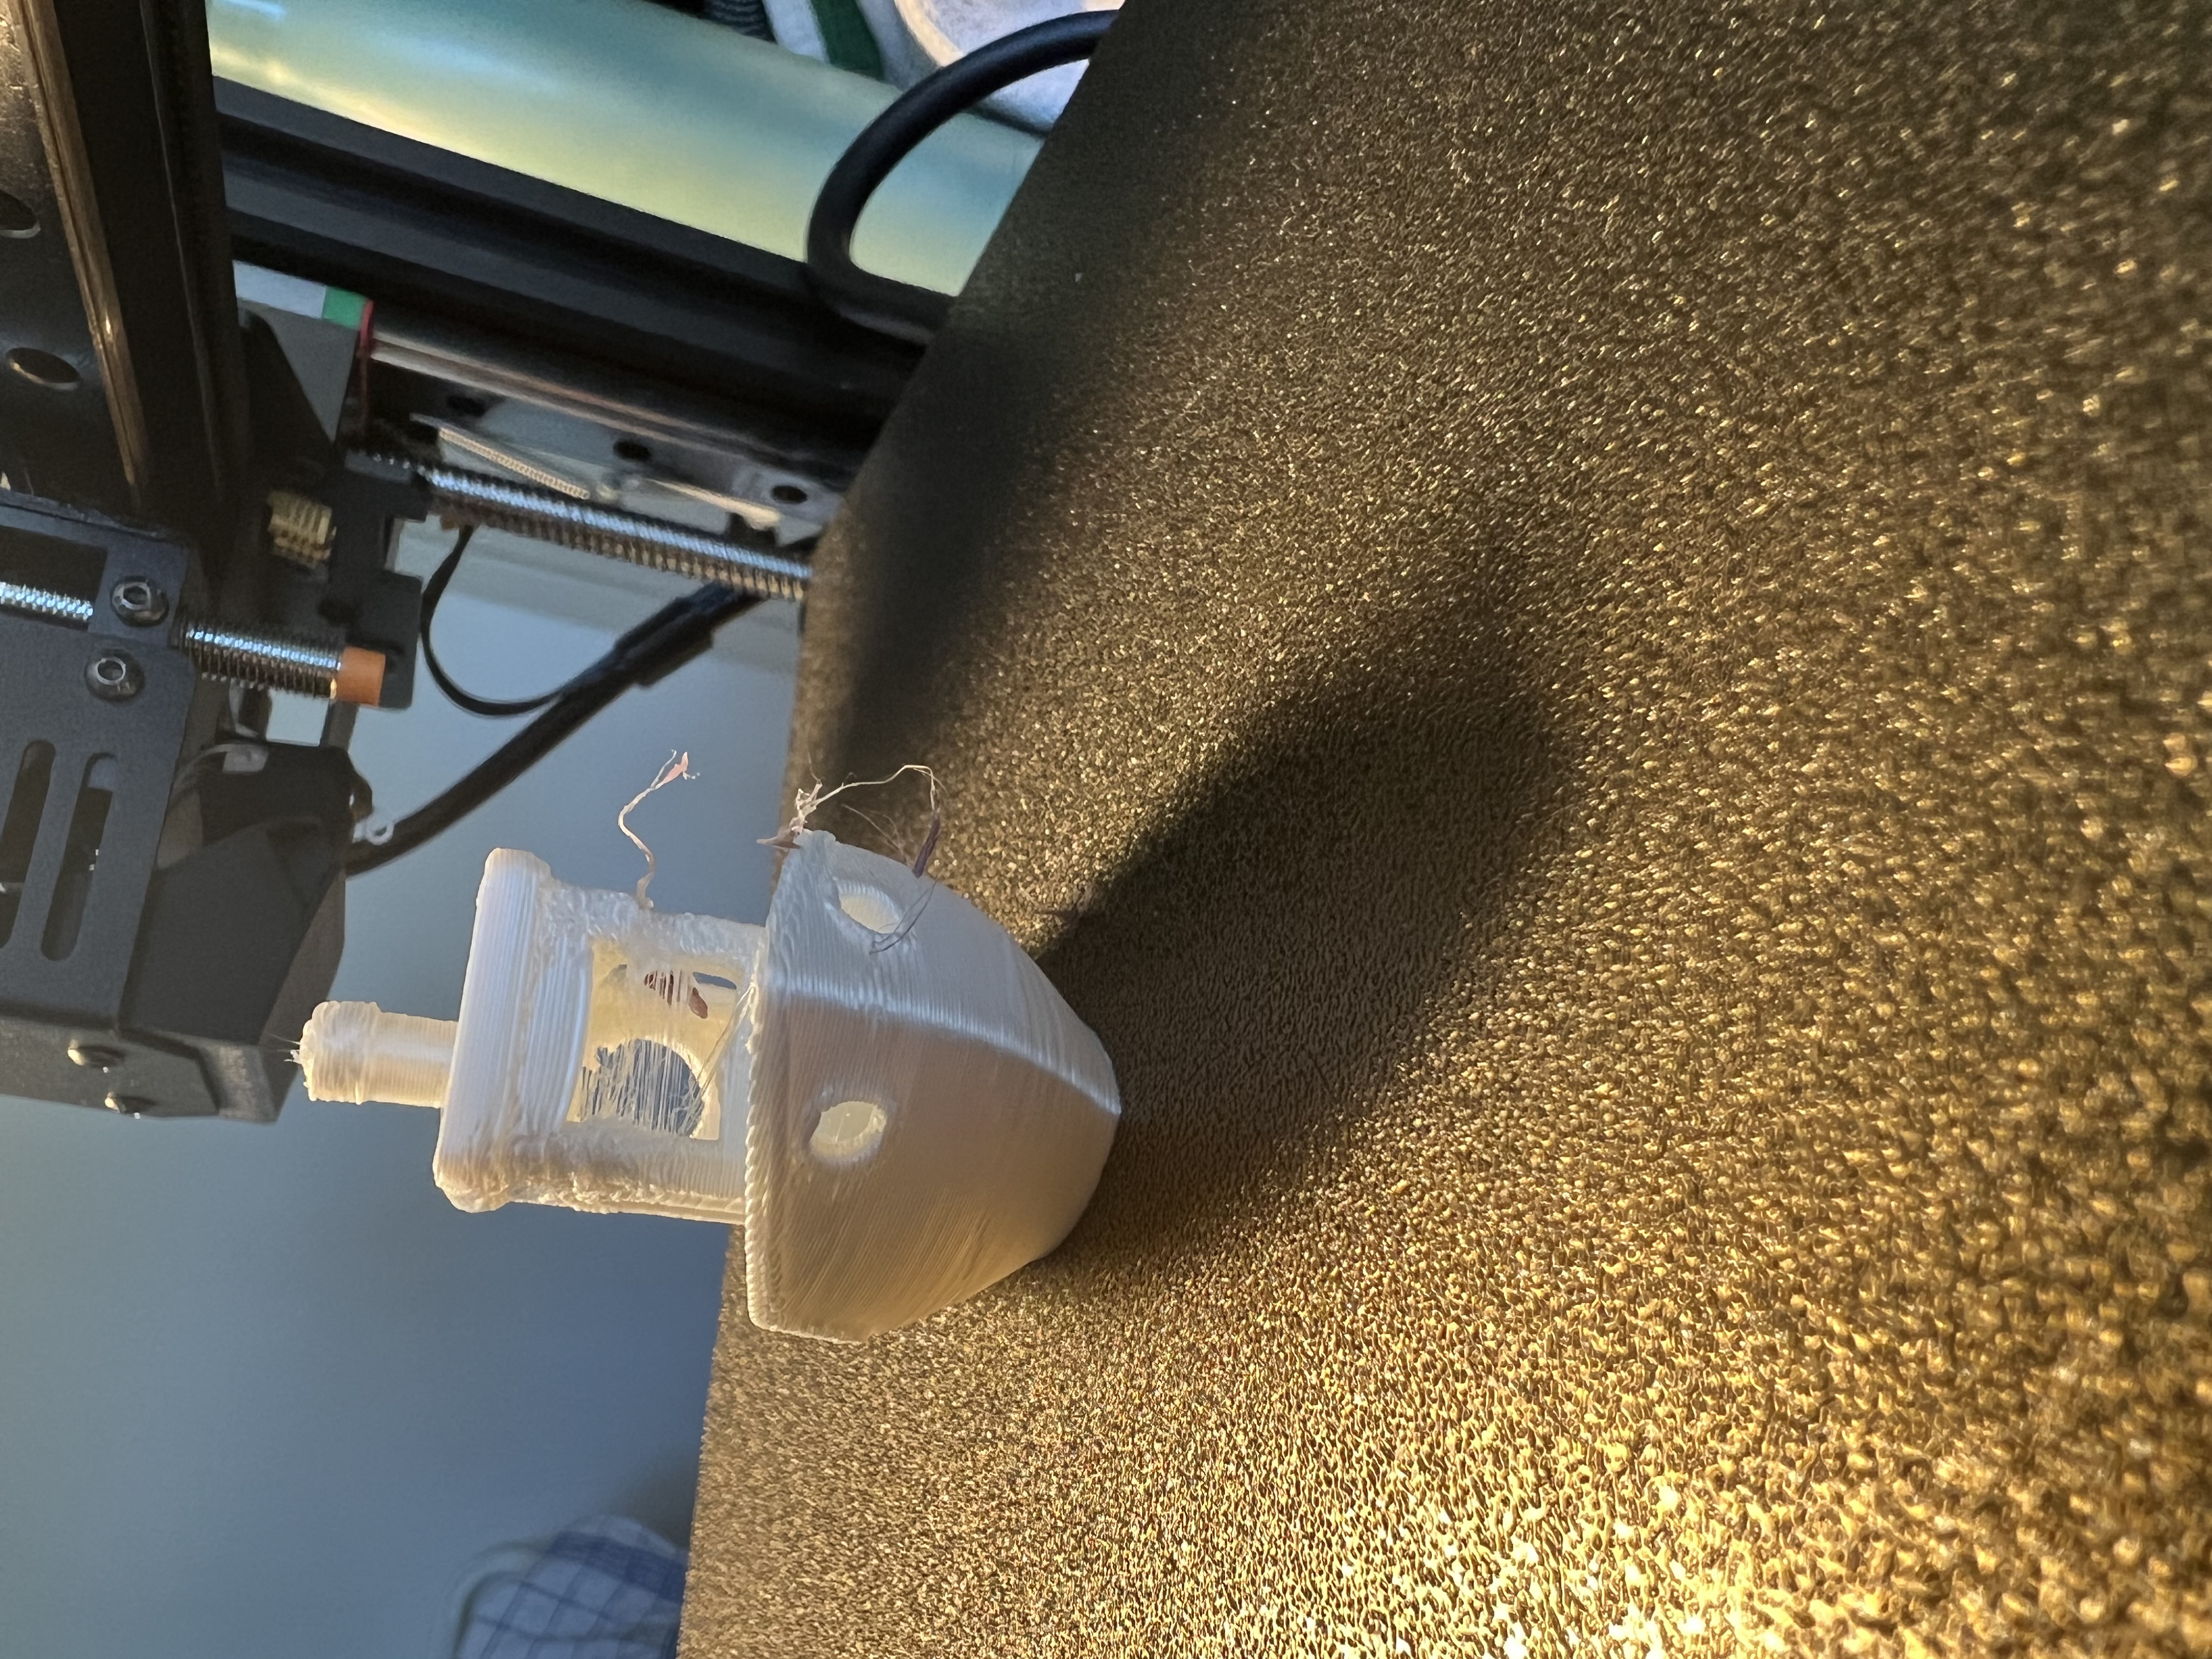 This is how the fast included benchy looked, note the purple filament at the side and inside the benchy.
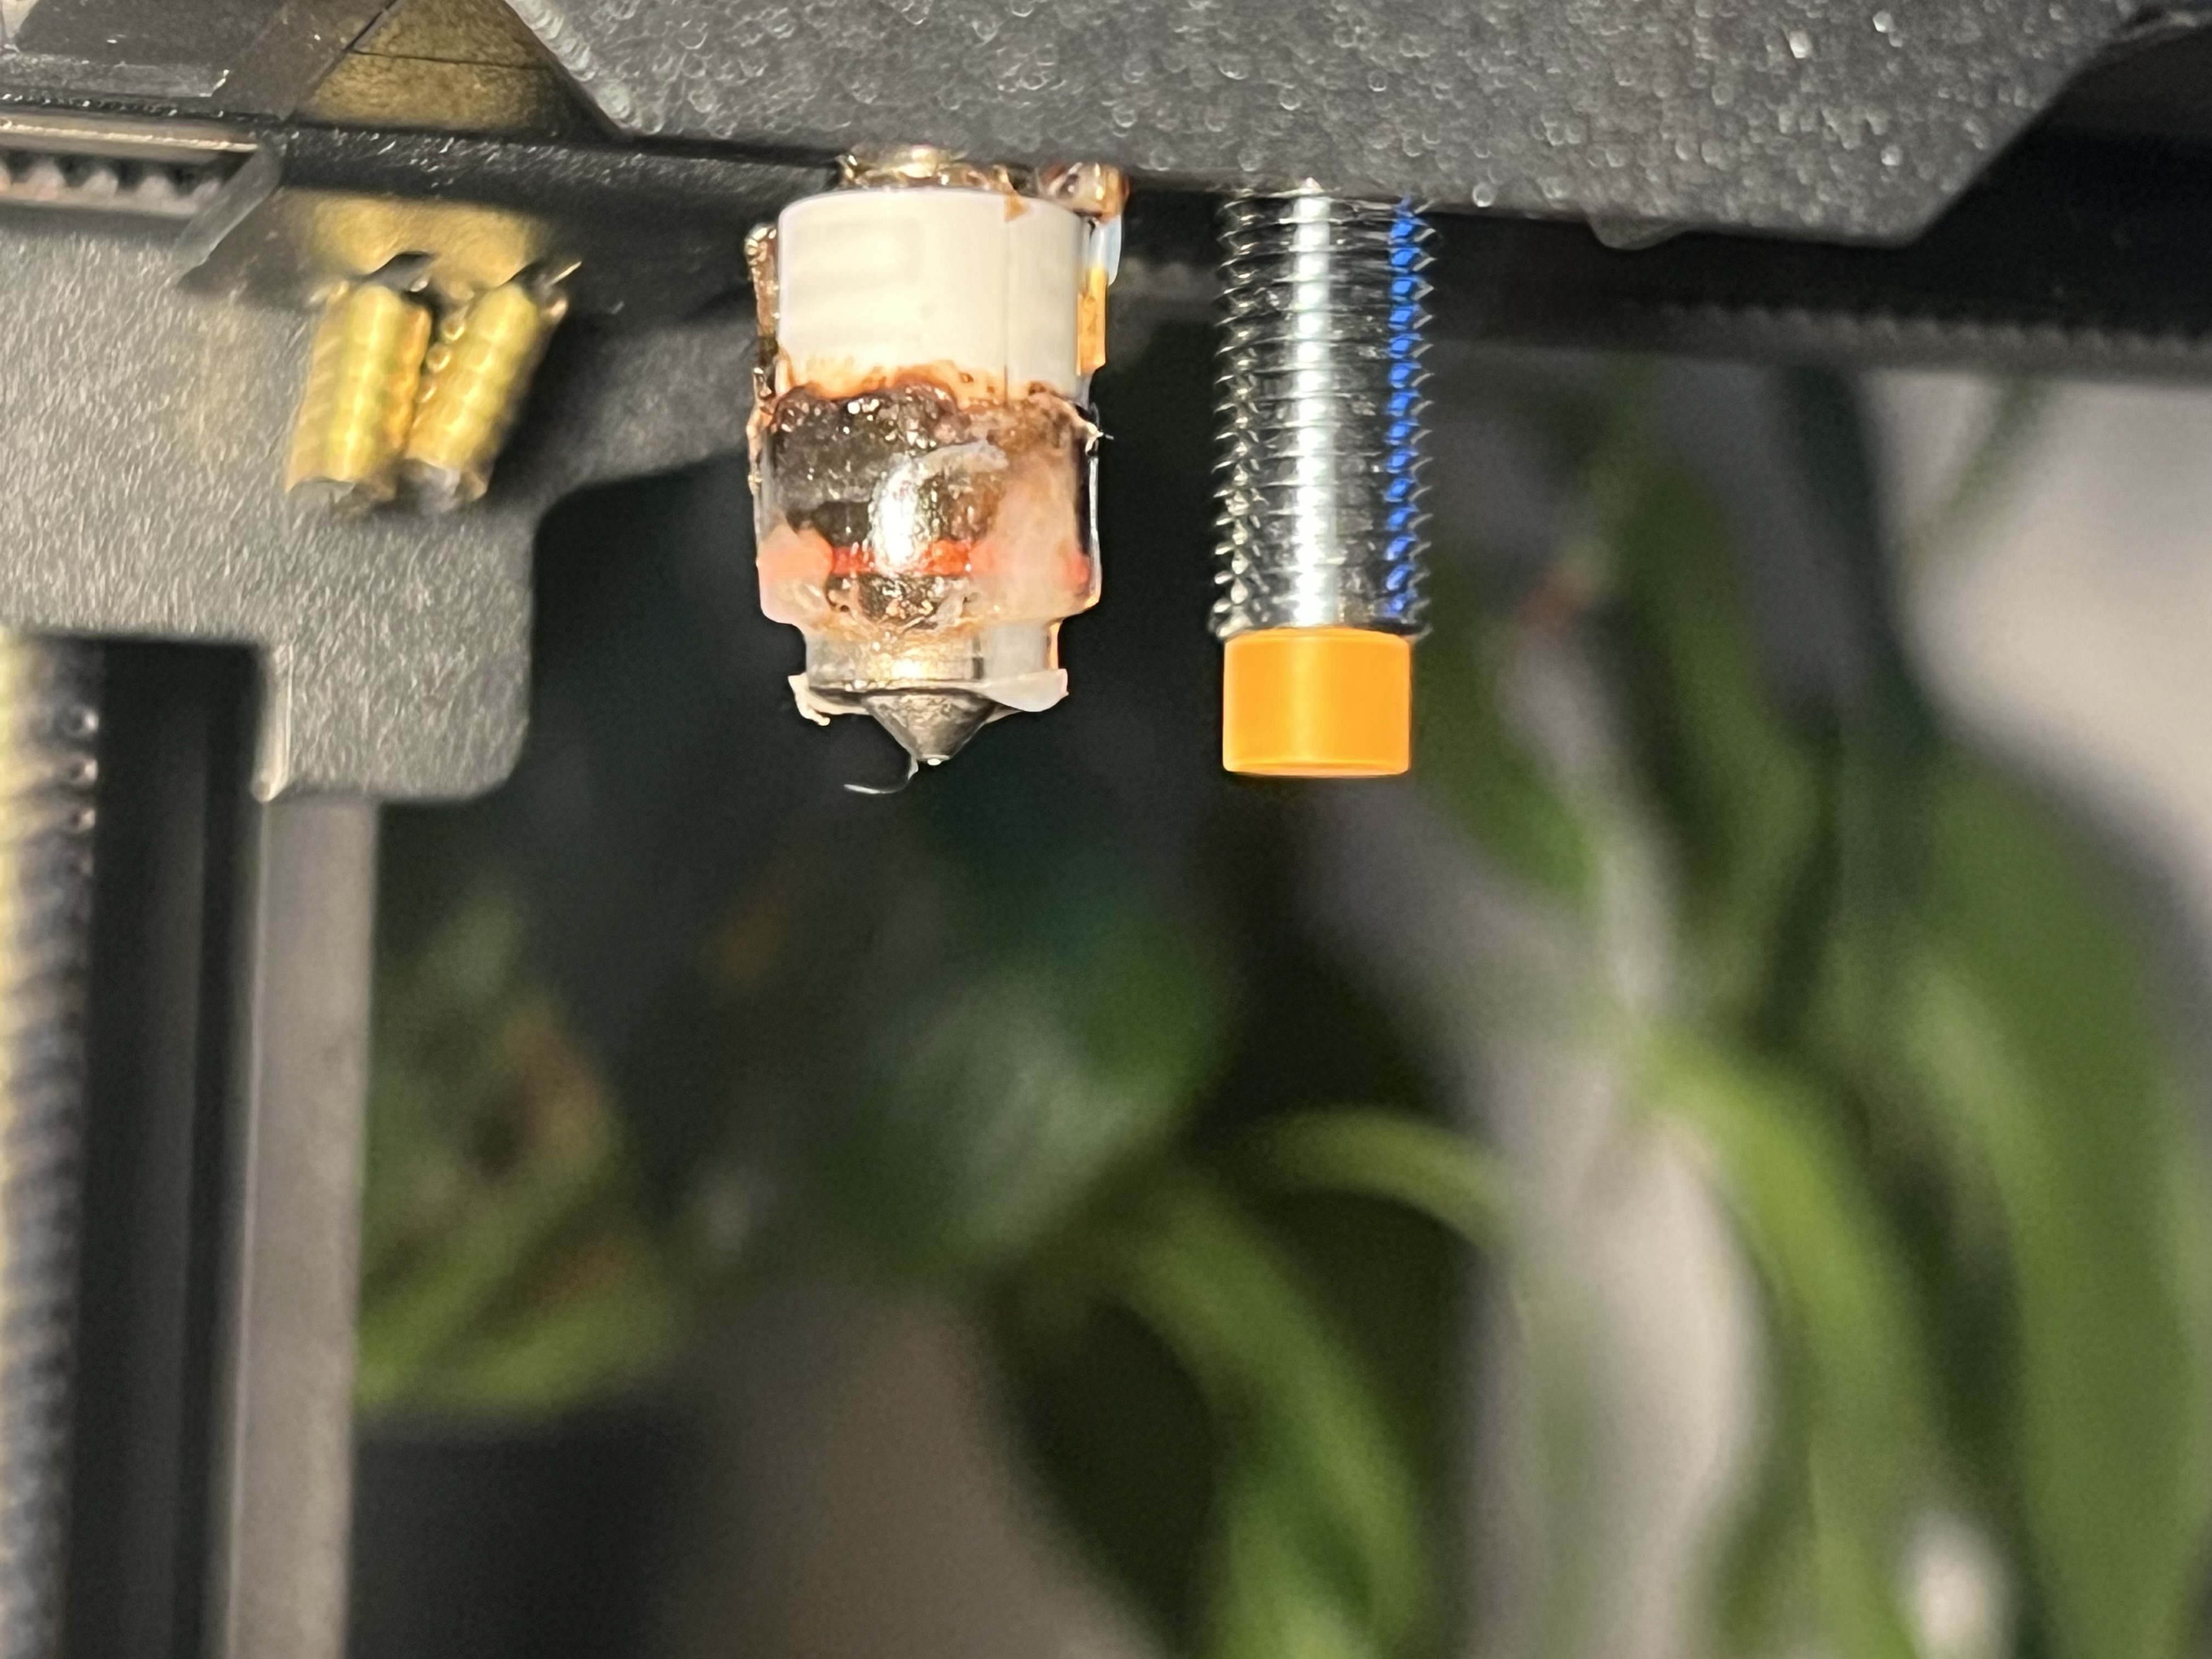 Plastig leaking between the nozzle and the heat transfer tube. Also note how close the bed probe is to the nozzle in z-hight.
Now we reach my first mistake. I tried to do my best not breaking anything. The issue is, there’s no good way of fastening nozzle as there’s nothing to hold on to while turning. What is usually a heatingblock is now a ceramic 360 block, and the bolt holding the assembly up has no flat side to hold on to. Thus everything spins. Somewhere in this something in the heating block seems to have broken. It still takes power but does not heat the extruder at all. This is where I contacted the support. After a few days the support replied that I could buy new heating elements on their site (these could not be found before). I sent in two orders. One before the support responded with a work around and a new printing head. The other a day or two after. My first order is, four weeks later no where to be found and the support has not responded on my request with an update on that order I sent two weeks ago. The second order came, however, the heating elements I ordered where not included, instead of ten heating elements I got ten metal tubes that goes inside of the ceramic heating element. Fortunately I also ordered some complete hotends, these arrived, although some were damaged. I have contacted support about this but am still waiting on a response.
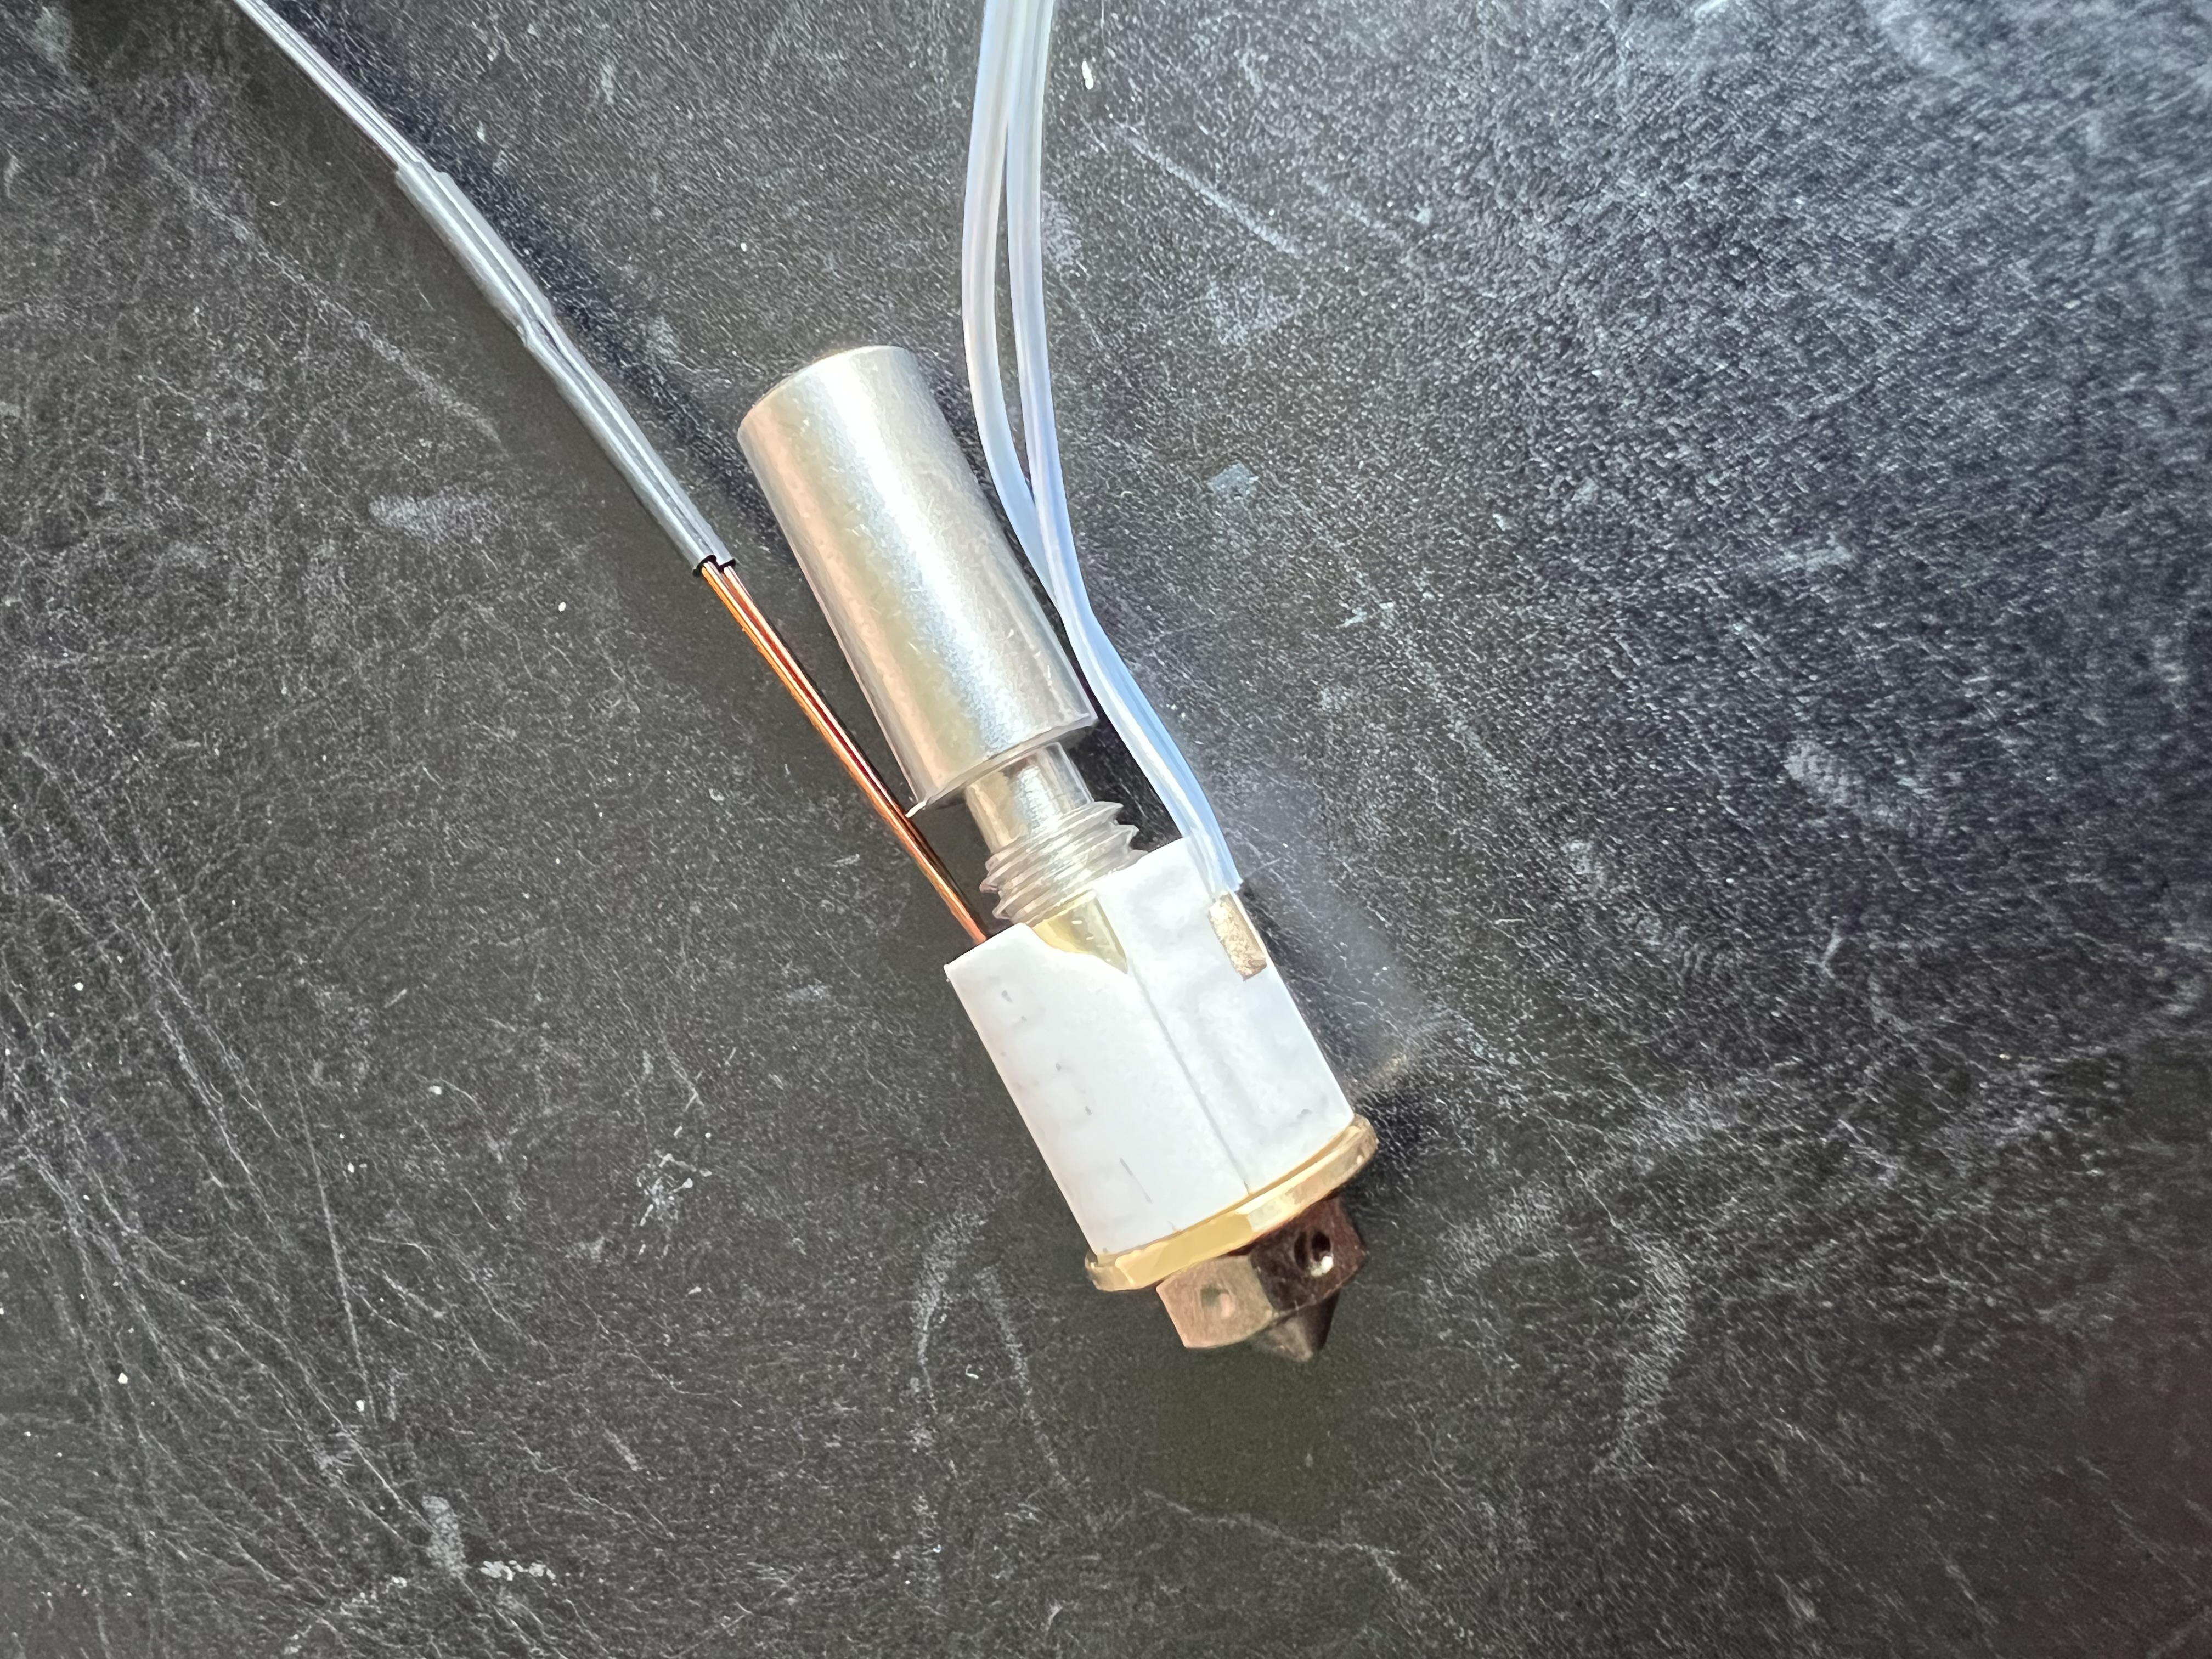 Complete bug damaged hotend, the white part is the heating element
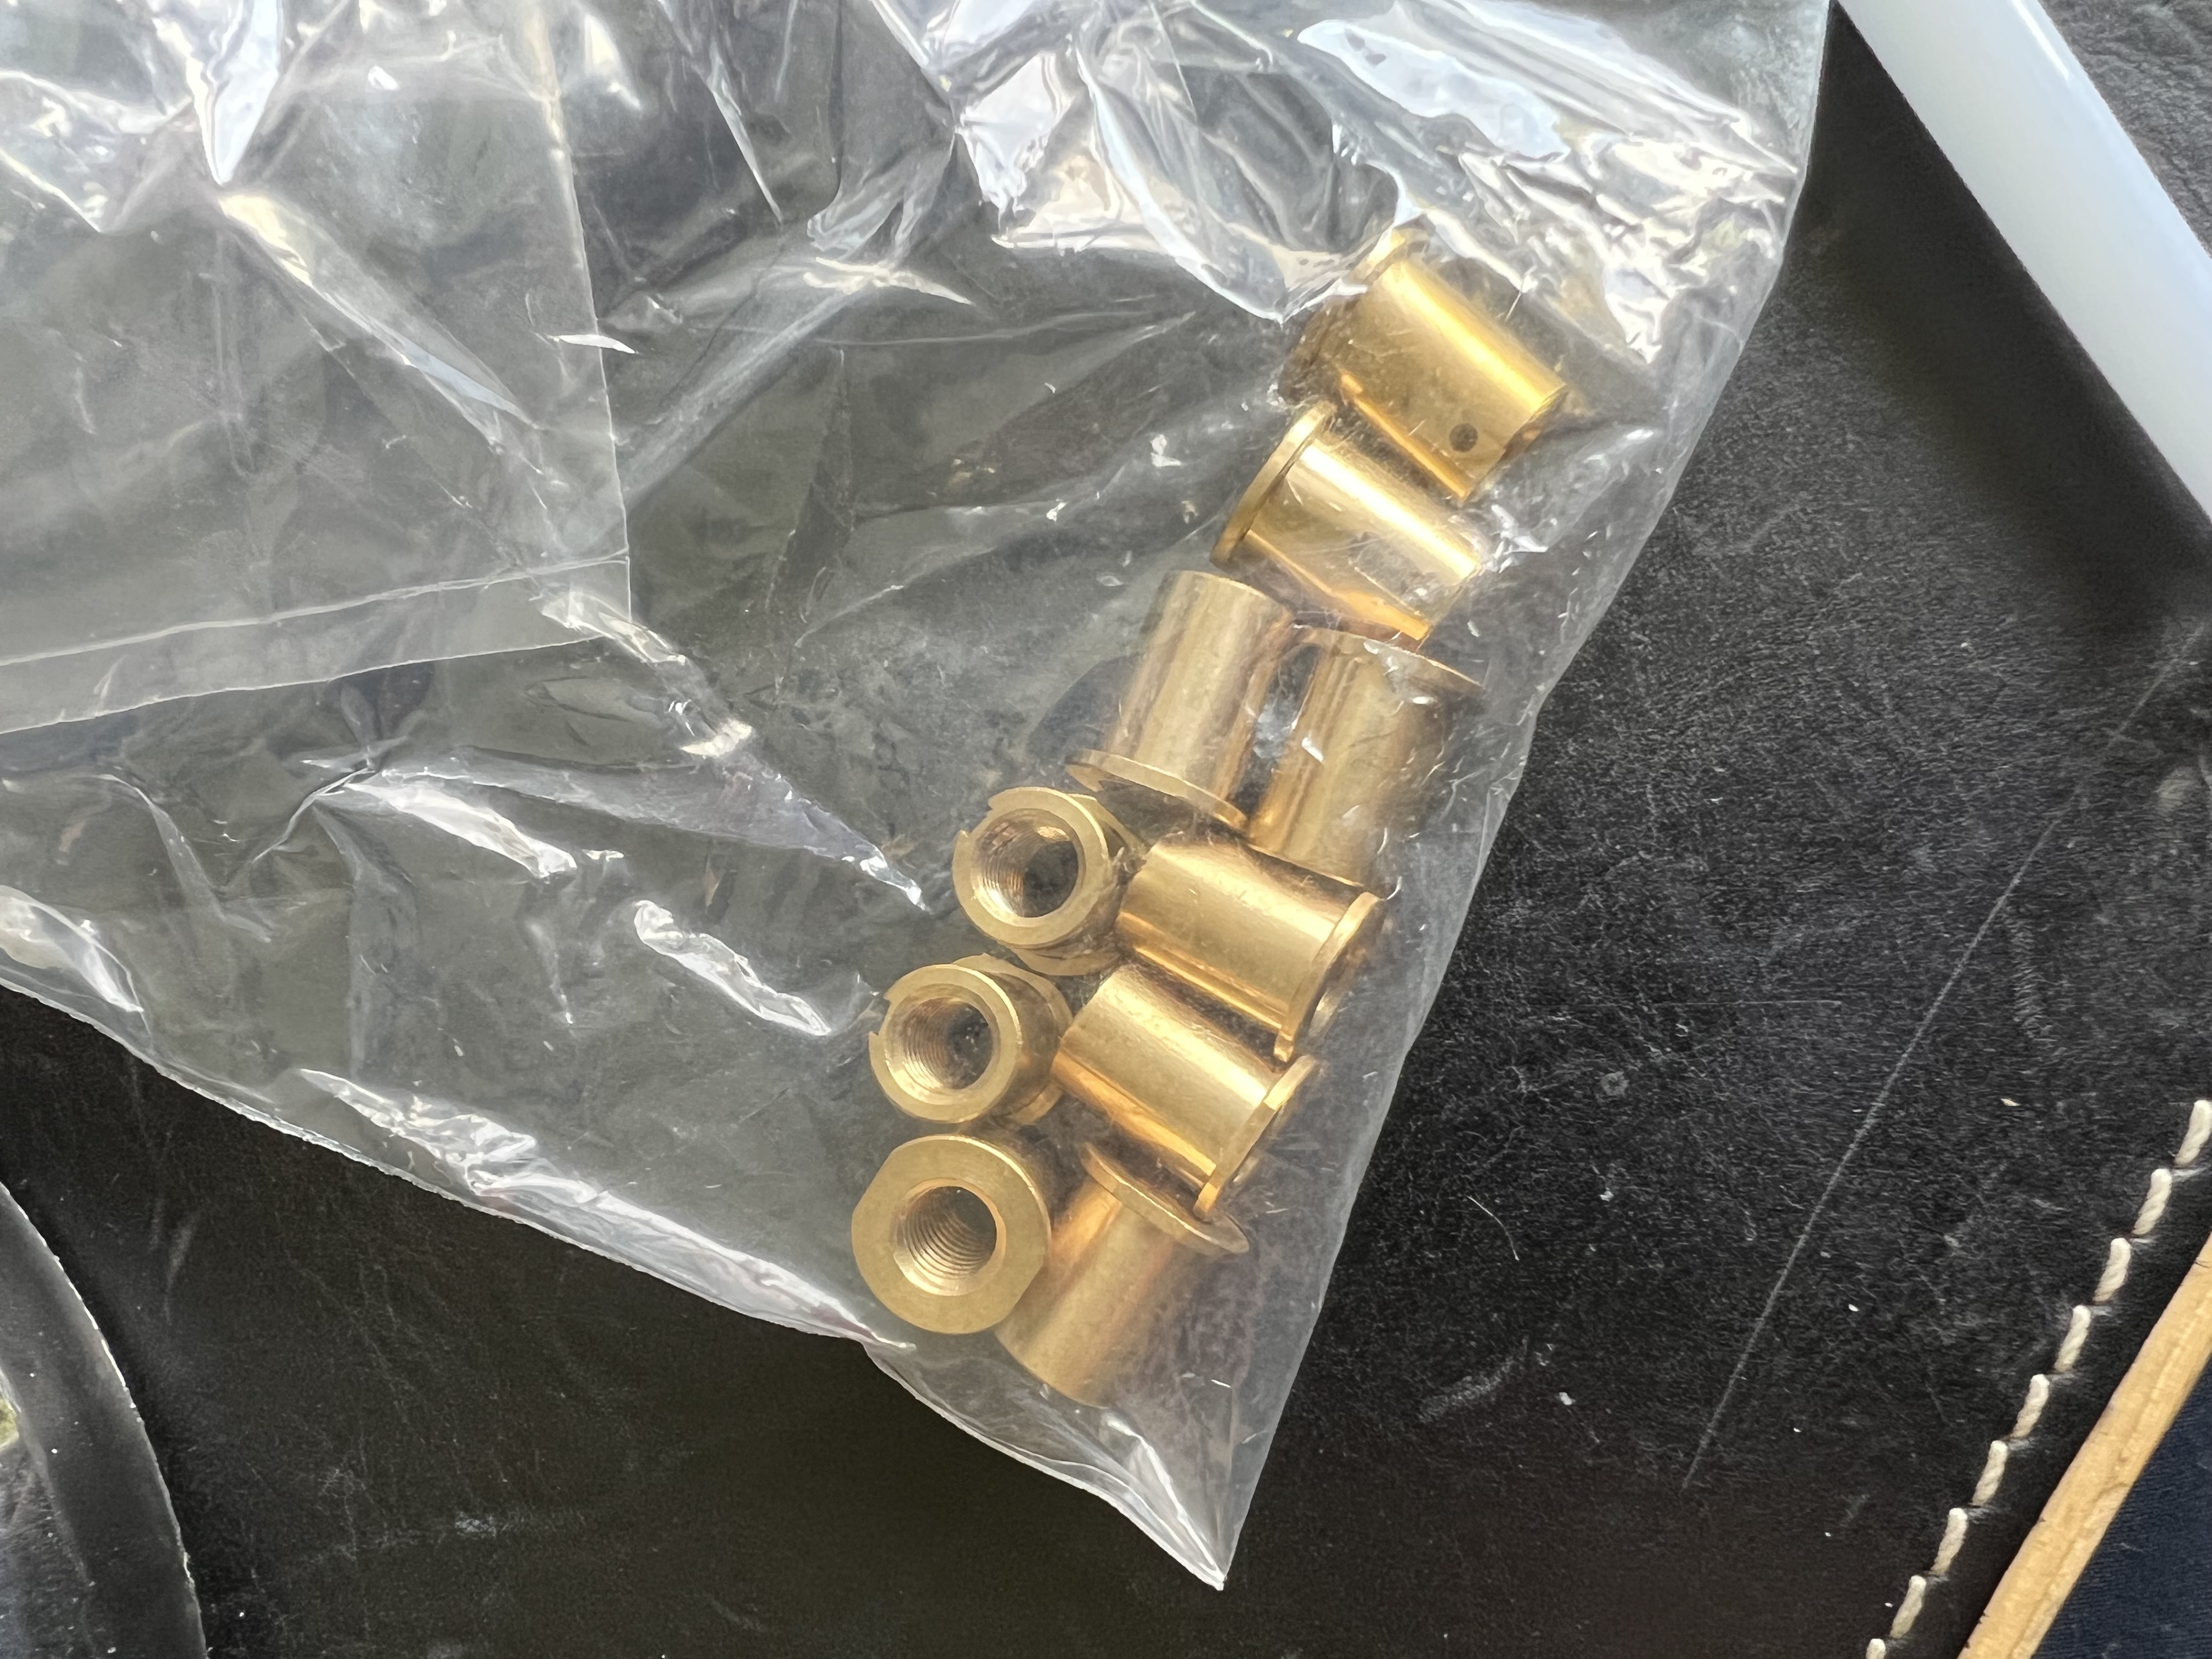 Heating transfer tubes that were delivered insted. Worth noting is the small flat parts on them, this is the only place you have to hold when screwing the nozzle tight.
An alternative solution to this problem is to just change the heading element completly. However if that is done be careful of the probe, if you set that to high up the z-axis will slam into the bed and cause all kind of issues. It has to be hovering just a milimeter up or so of the actual nozzle. This demands tight tolerances of the printer, if anything sticks up it might drag it loose from the bed.
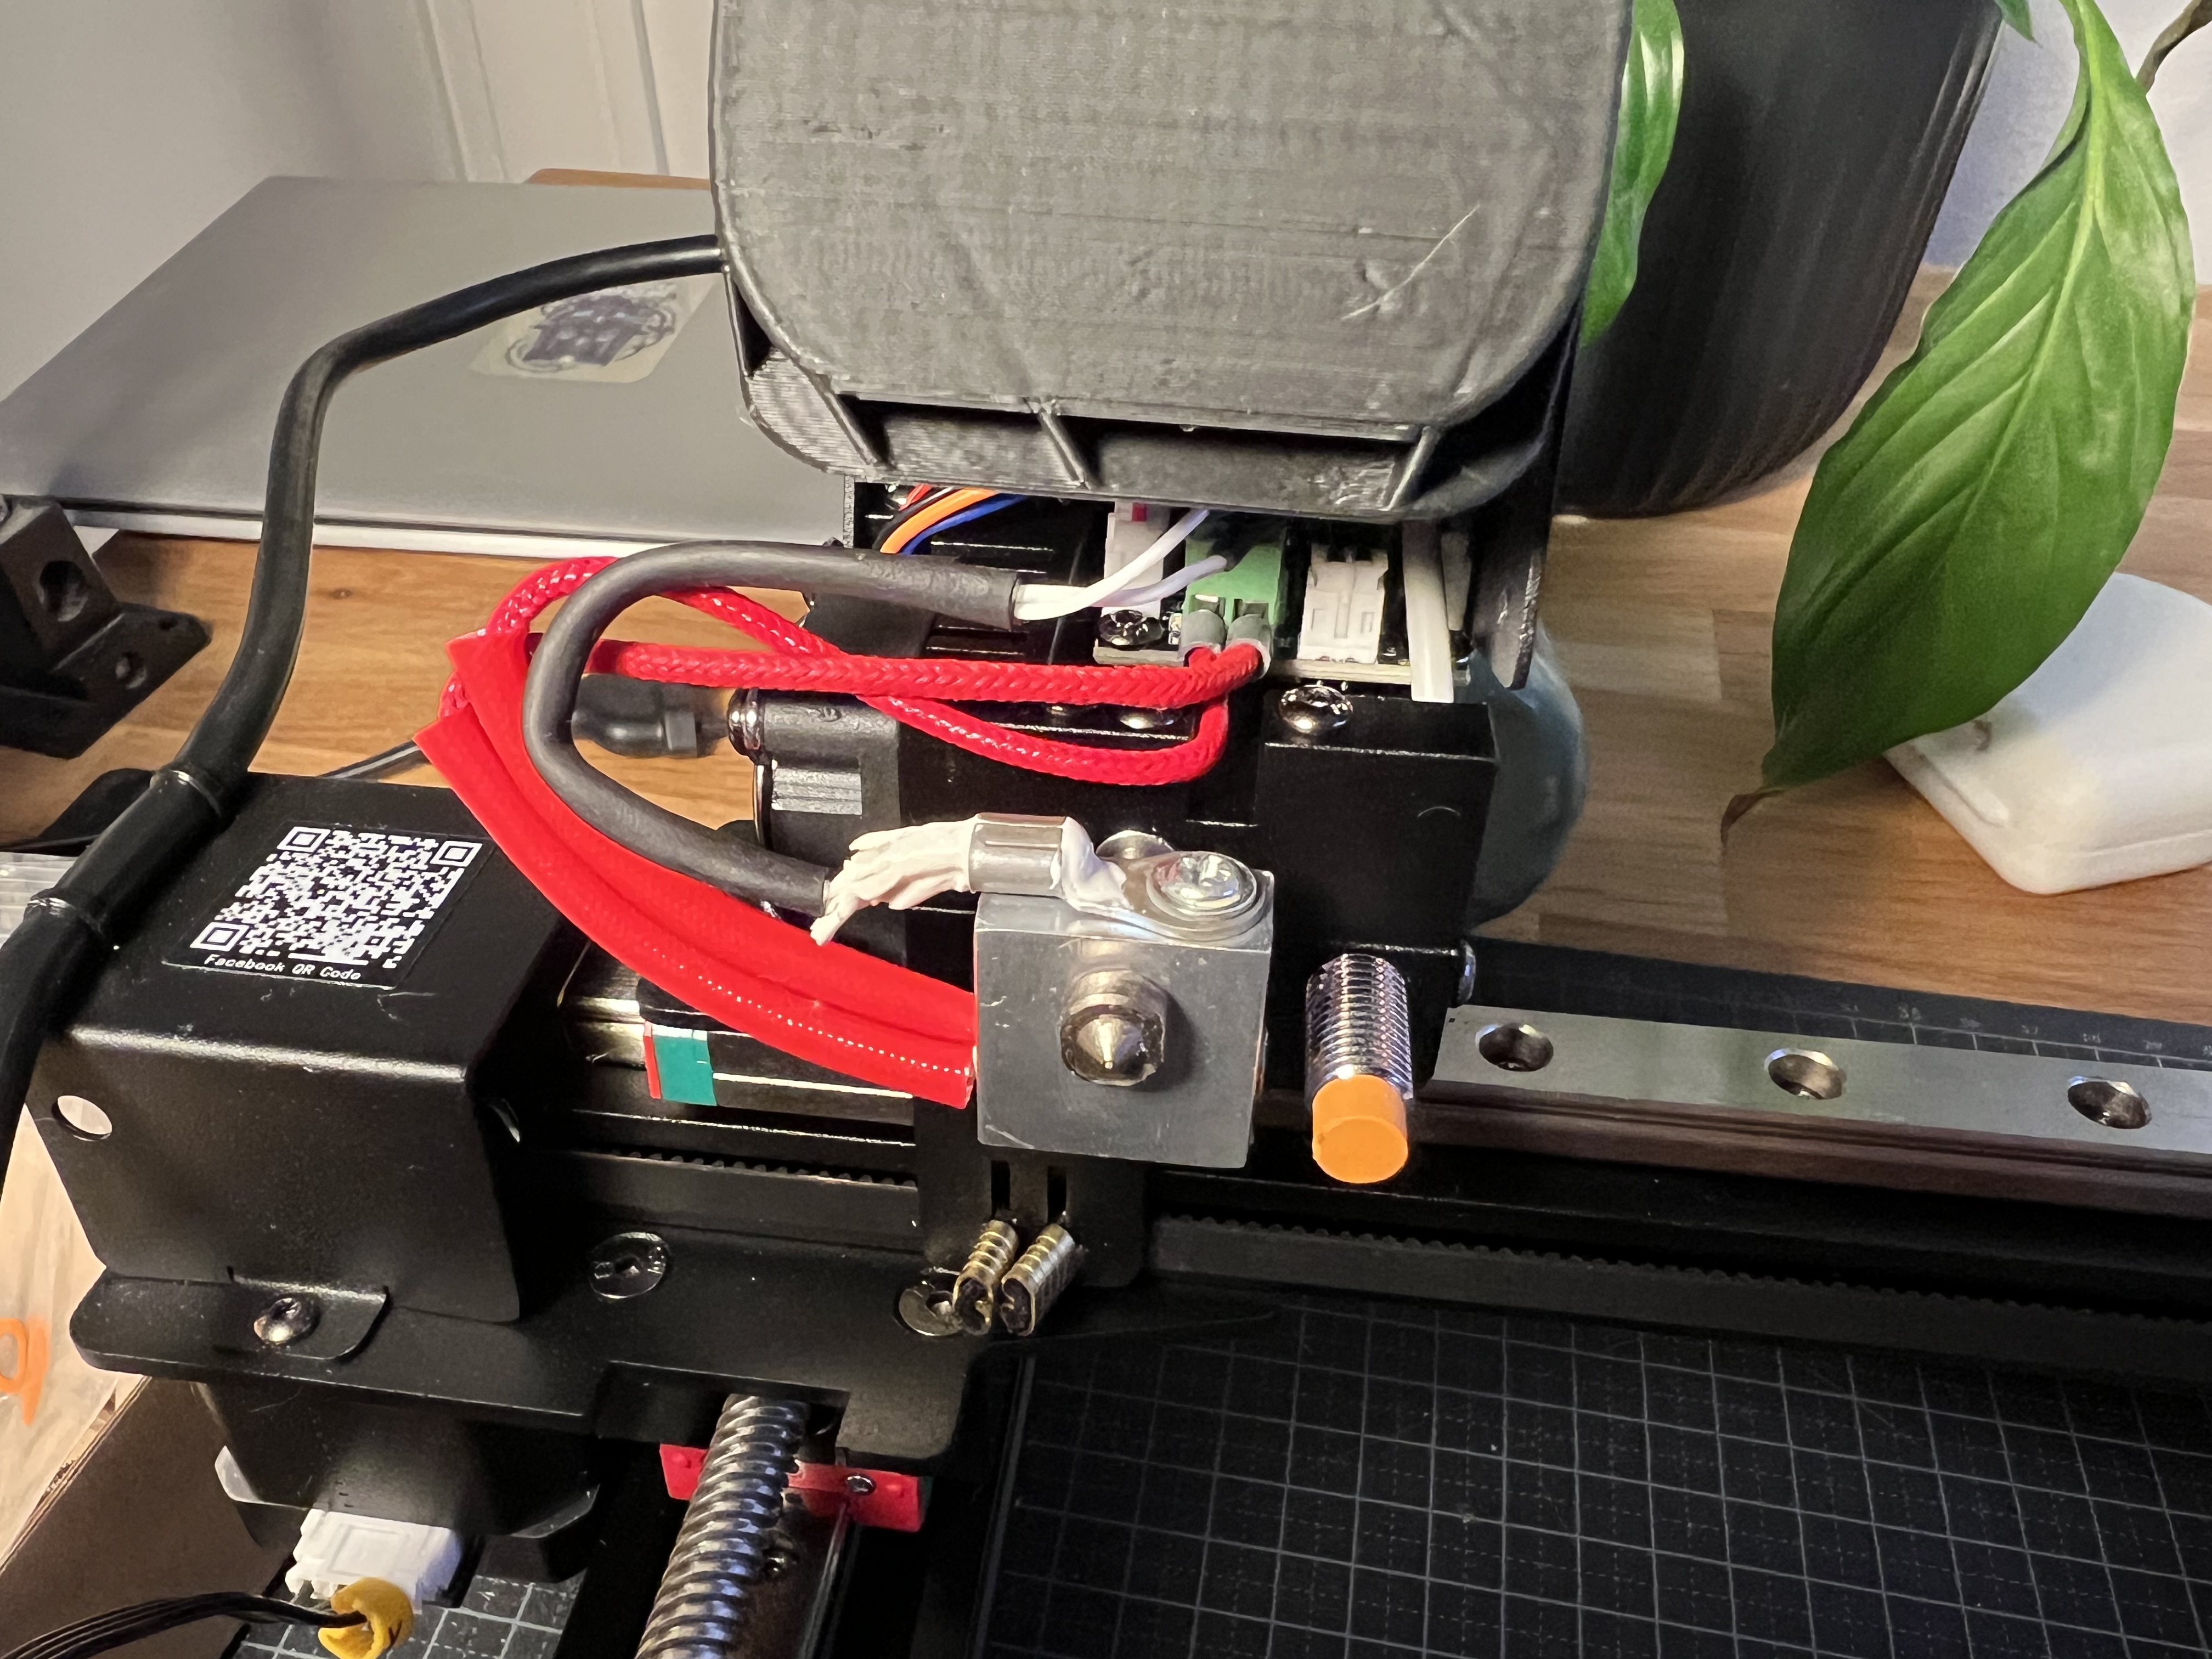 An alternative solution with a regular heating block which might be easier to screw tight
Problems with new firmware
During the time it took to get new hotends I found that they had released new firmware. I opted to install it. I will give them they warned that it might be unstable, and I’m very happy to see they included a EMMC to micro SD-adapter in the package. However, the new firmware is from what I can find missing screen configuration. Meaning the screen will only say loading, forever. Still working on getting that to work. Unfortunately the also don’t serve the firmware versions via some kind of git, but rather via OneDrive. Meaning one can’t get the old version back. I also found the extruder in the new firmware extrudes in the wrong direction and that the probe tries to probe outside of the printer area. These can be fixed in the config but it’s a bit weird they did not quality control some of the most used features.
As of right now the printer works, but I have cooling issues. The printers fan only works on 100% fan speed, and given the 3D-printed air guide by this time no longer sits perfectly it cools the material in the hotend, which leads to problems when the filament gets retracted. There are new better designed air guides, both on printables (labeled adult for some reason) and also from Kingroon (this time om Gdrive). However, none of these fit the printer. It seems Kingroon has redesigned the printer head and moved the screw holes since I bought mine. As I have access to other printers my solution to this will be to redesign and change this and with that make some updates.
Conclusion
I’ve learned a lot about how printers work, what can be configured, how to troubleshoot, level beds, what sounds mean a failed print, printing speeds, cooling and so on. I can find some joy in this process, but this is not for everyone. For a person who’s just looking for a cheap printer I would probalby recommend something more standard with a larger user base. An Ender 3 of some kind or a Sovol SV07. Maybe even a Core XY. This is a rushed and unfinished printer with a support that promises way over what it can deliver. It’s not one thing, but the broken software updates, macros in dual languages, bad Quality Control, unfixed slicer instructions that only works on a specific version with locked parameters, lack of spare-parts and so on, many of these things will get better over time but as of right now it’s a bit of a mess. I might also been unlucky with shippments and support but I somehow doubt it. If you really really want this printer, it does work, it will require a lot of love but it does work. Just make sure to buy some spare-parts, hope they show up and realize you’ll be getting little to no help. It will be a challenge but you will also learn a lot. If your experienced with printers, maybe already have one and am willing to spend time trimming this one in it might also be a cheap investment for a printerfarm but I would probably rather buy a Creality K1, some Bambu P1P or alike. After all, reliability and trust in sparepart delivery is very important if running a farm.
Future upgrades
First upgrade will be to change the PSU fan for something that is less noisy. For this one needs a voltage stepdown from 24V to 5V. I choose to go Noctua. I will probably also put in some temperature probe, as of now it runs from the moment you start the printer until it’s shut down.
Secondly is the cooling if the print, the air guide needs to be redesigned and I will install other fans here as well, hopefully these can be controlled in percentage as well. Here’s another place I’m in need of a voltage stepdown.
Thirdly, fix a profile for something else other then Cura 5.3.
Forth, fix the screen again, even though this isn’t needed with the web GUI it’s nice being able to just glare over and see the temperatures.
Fifth, find the optimal print speed, MyTechFun found this to be an issue in vase mode but I think 350mm/s is a stretch even if printing normally in layers.
Sixth, print better cable guides and probably a better holder for the filament
Apart from this I also need to get better at modeling. At the moment I’m working on leveling up my skills in FreeCAD. I’ve hit a few bumps in the road so far and it’s not as intuitive as I would have hoped but it runs locally on Linux and has a non-weird license.
Once this is fixed I can hopefully also start printing what I originally bought the printer for. It of course might sound like I’m mostly frustrated and to a part that is probably true. I was hoping the printer was a bit more finished then this and that the quality control was better, but this frustration is always a part of the learning curve. Through this I have learned a lot that I otherwise would not. I have a pause from this project now but will bring an updates once there are any.